How to Configure autologon windows 7
How to configure autologon WINDOWS 7
This tutorial describes how to configure Windows to autologon process by storing your password. By using this feature, other users can start your computer and use the account that you establish to automatically log on.
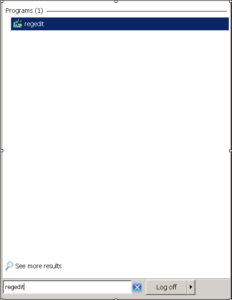
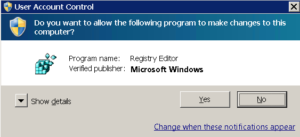
- Click the search bar and type regedit and hit enter.
- Select yes on the user control window.
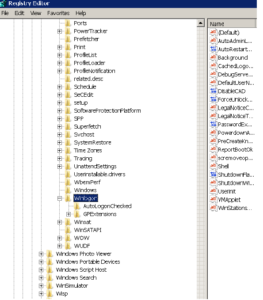
- Navigate to the following registry key:
HKEY_LOCAL_MACHINESOFTWAREMicrosoftWindows NTCurrentVersionWinlogon
- Double Click the DefaultUserName entry and type the username to log on in the value data, and the click OK.
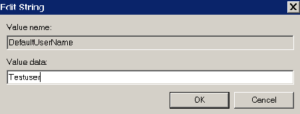
if registry value name is not found, create a new String Value(REG_SZ) with value name as DefaultUserName.
- Hit the DefaultPassword entry and type the username to log on in the value data, and the click OK.
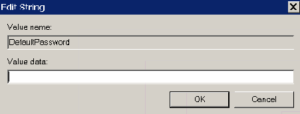
if registry value DefaultPassword is not found, create a new String Value(REG_SZ) with value name as DefaultPassword.
- In windows 7, DefaultDomainName has to be specified also, So double click on DefaultDomainName, and specify the domain name. if it’s local username, specify local host name.
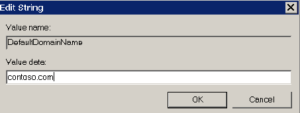
if registry value DefaultDomainName is not found, create a new String Value(REG_SZ) with value name as DefaultDomainName.
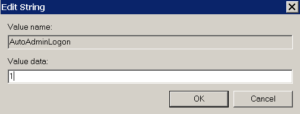
- Edit the AutoAdminLogon entry, type 1 in the value data field, and thte click OK.
- Exit Registry Editor and Restart the computer.